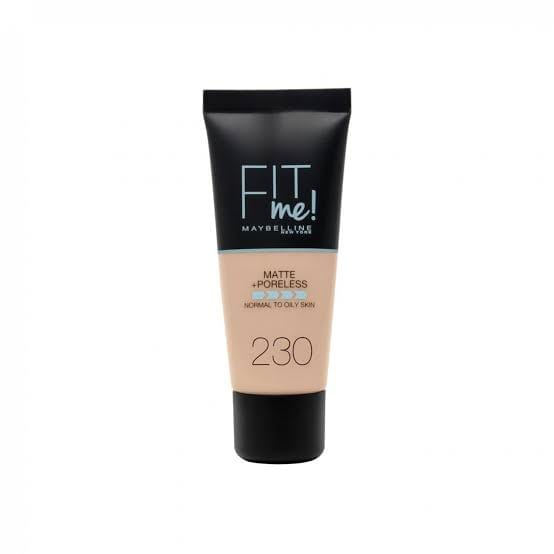
In the realm of beauty and makeup, achieving a flawless and natural look begins with the right foundation. Maybelline’s Fit Me Foundation has become a staple for many makeup enthusiasts, known for its extensive shade range and ability to provide a seamless finish. In this step-by-step tutorial, we’ll delve into what makes Fit Me Foundation special, and guide you through the process of applying it for a natural, radiant look.
What is Fit Me Foundation?
Maybelline’s Fit Me Foundation is a versatile makeup product designed to cater to a variety of skin tones and types. The Fit Me line includes a range of foundations, each addressing specific needs, such as the “Poreless Fit Me Foundation” that focuses on creating a smooth and refined complexion. The formulation is lightweight, making it ideal for achieving a natural finish without feeling heavy on the skin.
Step-By-Step Tutorial: How To Apply Fit Me Foundation For A Natural Look.
Step 1: Start with a Clean Canvas: The importance of starting with a clean canvas cannot be overstated. Cleansing your face thoroughly removes any residual makeup, oil, or impurities that may hinder the foundation’s adherence. Use a gentle cleanser suited to your skin type and follow up with a lightweight, non-comedogenic moisturizer to ensure your skin is hydrated and ready for makeup application.
Step 2: Select the Right Shade: Fit Me Foundation’s claim to fame lies in its diverse shade range. The inclusive selection caters to various undertones and skin colors, ensuring that there’s a perfect match for everyone. Take advantage of this variety by selecting a shade that seamlessly blends with your natural skin tone. Testing the foundation on your jawline or wrist is a reliable method to find your ideal match.
Step 3: Prime Your Skin: Makeup primers act as a crucial step in the foundation application process. They create a smooth surface, blur imperfections, and enhance the foundation’s longevity. Opt for a primer that addresses your specific concerns, whether it’s reducing the appearance of pores, adding hydration, or providing a radiant glow. Applying a thin layer evenly across your face ensures a flawless base for the Fit Me Foundation.
Step 4: Dispense the Foundation: Fit Me Foundation offers options in both liquid and stick formulations, catering to individual preferences. The liquid foundation can be dispensed onto the back of your hand for easy application, while the stick variant allows for direct application on the face. Understanding the features of each type helps in choosing the one that aligns with your application style and coverage needs.
Step 5: Apply the Foundation For Liquid Foundation:
- Tools: Utilize a makeup sponge or brush for a seamless application.
- Technique: Begin from the center of your face and blend outward. This method ensures an even distribution of the foundation, preventing any harsh lines.
- Blending into Jawline and Neck: Extend the application to your jawline and blend into your neck to achieve a natural, cohesive look.
For Stick Foundation:
- Direct Application: Use the stick to draw lines on your forehead, cheeks, nose, and chin for targeted coverage.
- Blending: Employ a makeup sponge or brush to blend the foundation, ensuring it melds effortlessly with your skin.
Step 6: Build for Desired Coverage: Fit Me Foundation’s buildable nature allows for customizable coverage. If you prefer a more natural look, a single layer may suffice. For those desiring additional coverage, especially in problem areas, a second layer can be applied. The key is to build gradually, achieving the desired finish without compromising a natural appearance.
Step 7: Concealer and Set: Concealer Application: Apply concealer to cover blemishes, dark circles, or any areas requiring extra coverage.
Step 8: Highlight and Contour (Optional): For those seeking an enhanced look, the optional step of highlighting and contouring can add dimension to the face. A highlighter applied to areas like cheekbones and the bridge of the nose imparts a radiant glow, while a matte bronzer or contour product defines features for a sculpted effect.
Step 9: Set with Setting Spray: Complete your makeup routine by setting your look with a setting spray. This final touch not only ensures the longevity of your makeup but also contributes to a natural, dewy finish. Hold the setting spray at arm’s length and mist over your face for an even application.
Step10: Setting with Translucent Powder: Set your foundation with a translucent powder to prevent excessive shine, especially in areas prone to oiliness. This step ensures your makeup stays intact throughout the day.
Conclusion:
Maybelline’s Fit Me Foundation, especially the Poreless Fit Me Foundation, has rightfully earned its place in the makeup routines of many. Its ability to provide natural coverage while accommodating a wide range of skin tones makes it a go-to choice for those seeking a flawless finish. By following this step-by-step tutorial, you can confidently apply Fit Me Foundation for a radiant, natural look that enhances your beauty without compromising comfort. Remember, makeup is a form of self-expression, so feel free to customize the tutorial to suit your unique style and preferences.


